

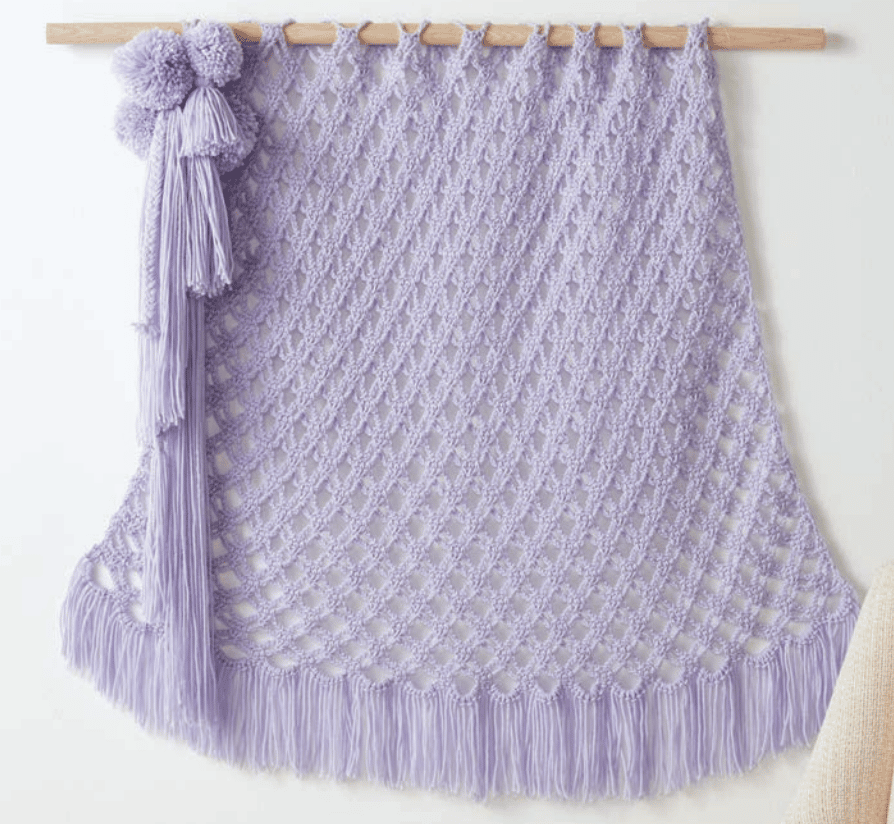
Add a unique design element to your home with this crochet wall hanging. Working in your selected shade of Caron One Pound, chains and half double crochet stitches combine to create a gorgeous mesh netting for this dreamy décor piece! Project also has you working in split half double crochet and split half double crochet 2(3) stitches together, for your added crocheting pleasure. Finish your original artwork with lighthearted pompoms and tassels for a wall hanging that’s a reflection of your personal style.
MATERIALS
Caron One Pound (16 oz/453.6 g; 812 yds/742 m) Fig (10643) 2 balls Size U.S. H/8 (5 mm) crochet hook or size needed to obtain gauge. 1″ [2.5 cm] diameter x 36″ [91.5 cm] long dowel. 5″ [12.5 cm], 9″ [23 cm], 18″ [45.5 cm] and 30″ [76 cm] wide pieces of cardboard for tassels. Tapestry needle.
MEASUREMENTS
Approx 32″ [81.5 cm] wide x 36“ [91.5 cm] tall, including fringe and after hanging. GAUGE 17 sts and 8 rows = 4″ [10 cm] in pat.
INSTRUCTIONS
Notes:
• Worked over foundation ch multiple of 8 ch +10.
• Piece is worked from Top down.
• Pat creates a curved bottom edge as side edges of pat work-up shorter than central pat repeats.
• Piece will stretch to size once hung on dowel.
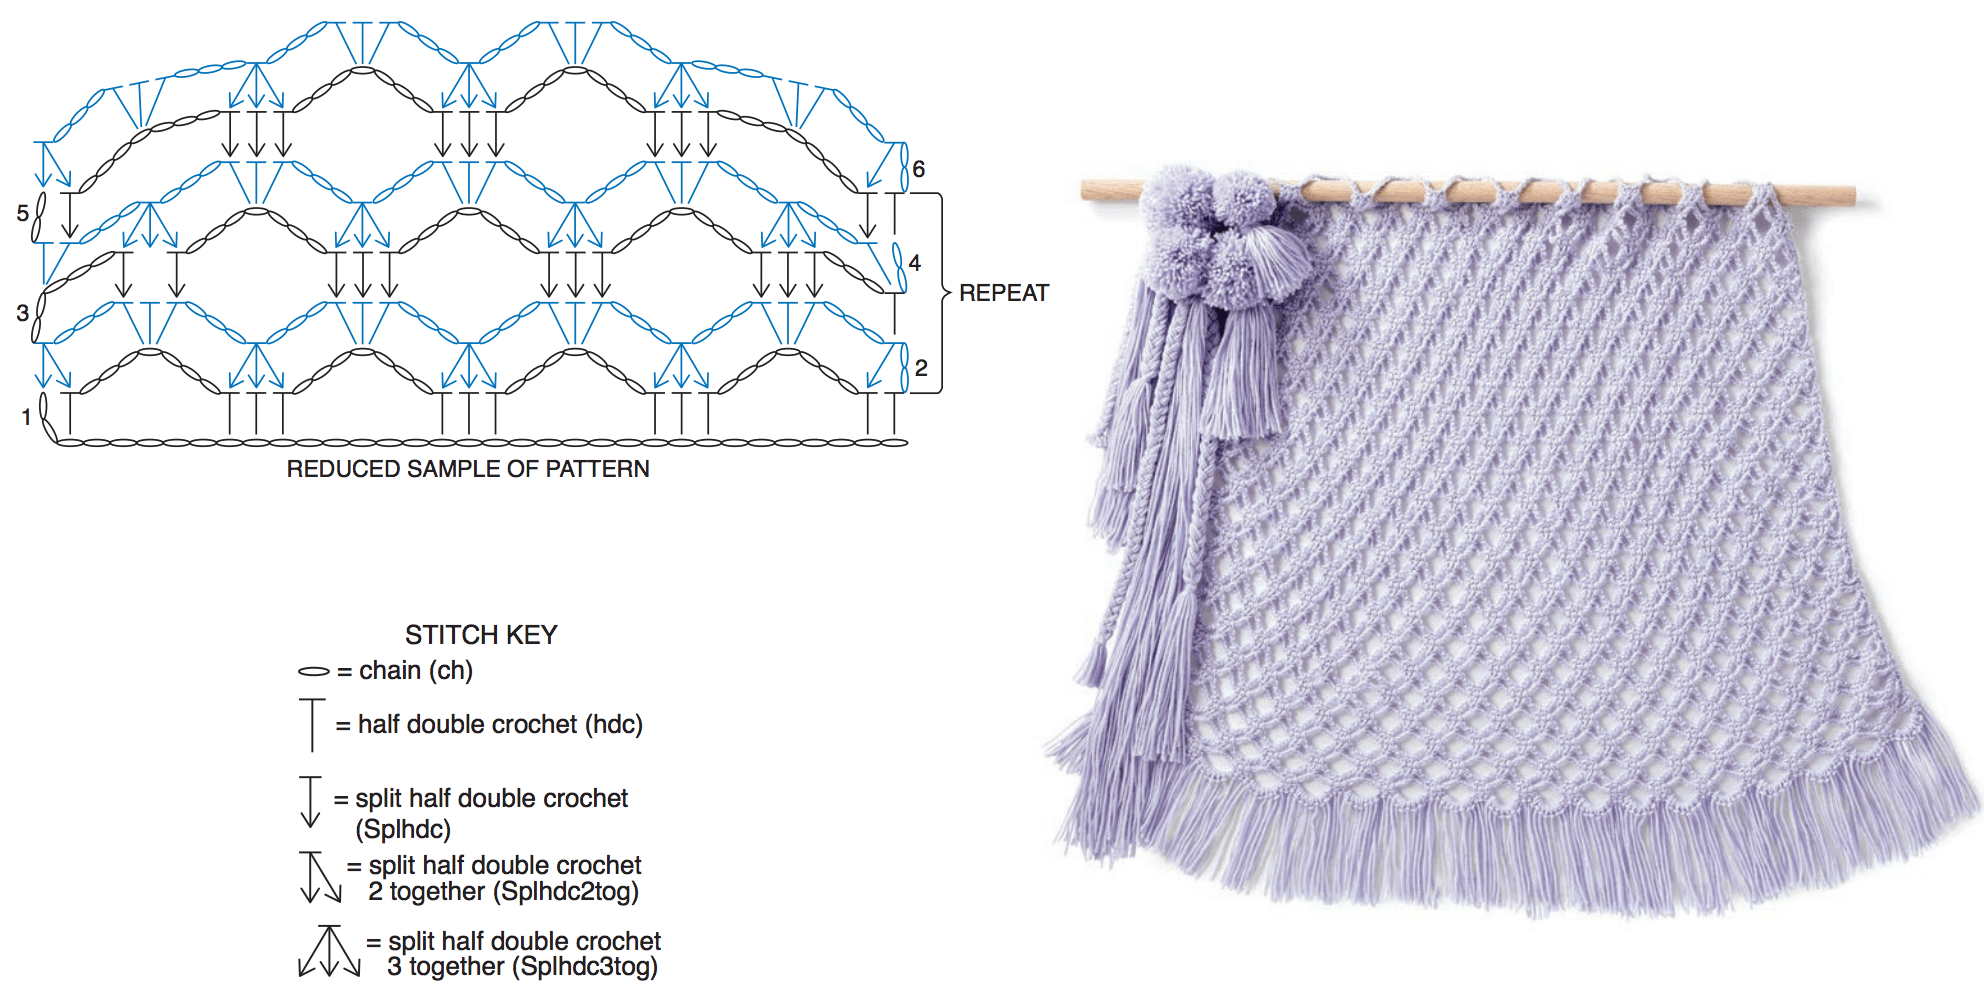
Ch 146. See diagram.
1st row: (WS). 1 hdc in 3rd ch from hook (counts as 2 hdc). Ch 7. Skip next 5 ch. *1 hdc in each of next 3 ch. Ch 7. Skip next 5 ch. Rep from * to last 2 ch. 1 hdc in each of last 2 ch. Turn. 181 sts (including hdc and ch sts).
2nd row: Ch 2 (counts as 1 hdc). 1 splhdc in next hdc. Ch 3. *Skip next 3 ch. 3 hdc in next ch. Ch 3. Skip next 3 ch. Splhdc3tog. Ch 3. Rep from * to last ch-7. Skip next 3 ch. 3 hdc in next ch. Ch 3. Skip next 3 ch. Splhdc2tog (working in last hdc and ch-2). Turn.
3rd row: Ch 5 (counts as 1 hdc. Ch 3). Skip next 3 ch. 1 splhdc in each of next 3 hdc. *Ch 7. Skip next: (Ch-3. Splhdc3tog. Ch-3). 1 splhdc in each of next 3 hdc. Rep from * to last ch-3. Ch 3. Skip next 3 ch. 1 hdc in top of last hdc. Turn.
4th row: Ch 2 (counts as 1 hdc) 1 hdc rst hdc. Ch 3. Skip next 3 ch. *Splhdc3tog. Ch 3. Skip next 3 ch. 3 hdc in next ch. Ch 3. Skip next 3 ch. Rep from * to last 3 hdc before last ch-3. Splhdc3tog. Ch 3. Skip next 3 ch. 2 hdc in next ch. Turn.
5th row: Ch 2 (counts as 1 hdc). 1 splhdc in next hdc. Ch 7. Skip next: (Ch-3. Splhdc3tog. Ch-3).*1 Splhdc in each of next 3 hdc. Ch 7. Skip next: (Ch-3. Splhdc3tog. Ch-3). Rep from * to last 2 hdc. 1 splhdc in next hdc. 1 hdc in last hdc. Turn.
6th to 45th rows: Rep 2nd to 5th rows 10 times more, ending on a 5th row. Fasten o .
FINISHING Fringe: Cut strands of yarn 12″ [30.5 cm] long. (Taking 1 strand, fold in half and knot into fringe) 7 times in each ch-7 sp and once into each hdc along Bottom edge of Wall Hanging (45th row). Trim fringe evenly.
DECORATIONS
Pompoms (make 4): Wind yarn around 4 fingers approx 150 times. Tie yarn tightly in the middle and leave long ends for attaching to Wall Hanging. Cut loops at both ends and trim to smooth round shape (if desired, make diferent sizes by winding around more or fewer fingers).
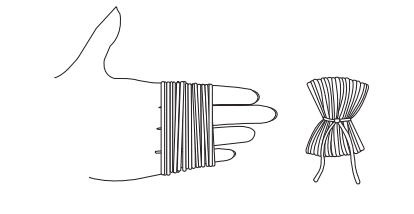
Tassels (make one of each 5″ [12.5 cm], 9″ [23 cm], 18″ [45.5 cm], and 30″ [76 cm] long): Wrap yarn around piece of cardboard 50 times. Tie securely at one end leaving Long Tails. Cut across other end. Wrap yarn 3 times around tassel 1″ [2.5 cm] from tied end and fasten securely.
Sew Pompoms and Tassels to top left-hand corner of Wall Hanging layering tassels below pompoms as shown in diagram. Braid small sections of the longer tassels, tying at the ends to secure, for added texture.
PATTERN CARE
Treat your finished project right! Make sure you read the care directions closely so your hard work ages gracefully.
- Do Not Bleach
- Do Not Dry Clean
- Do Not Iron
- Machine Wash, Delicate Cycle
- Tumble Dry, Delicate Setting
Share your results!! Come back for more !!
